7 Steps to Conservatory Installation
After initial discussion with us, a surveyor will usually visit to check your site and make sure that everything you’ve chosen is possible and practical. They will check everything from drainage on site to style and size of conservatory, through to access for the delivery of materials.
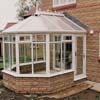
Once you’ve decided on your conservatory style and planned all the features you want, it’s time to sit back, relax and watch it take shape.
By choosing a Conservatory Village to fit your conservatory, you can be assured of a hassle-
There are seven main steps involved in the construction of a typical conservatory –
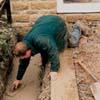
Step 1
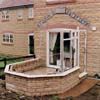
The site is prepared, the foundations dug, drainage installed and concrete poured in to create the foundations.
Step 2
If required, a dwarf cavity wall is built.
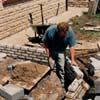
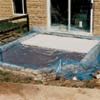
Step 3
The floor slab is prepared and insulation is added to the cavity wall and floor slab.
Step 4
Once the inner and outer leaves of the cavity walls are completed (to match existing brickwork as far as possible), uPVC cills and frames are fitted to the top of the dwarf wall.
Step 5
The roof is then installed –

Step 6
The ventilated aluminium ridge is fitted; internal cladding is fitted to the ridge; glass sealed units are fitted into the side frames to complete the structure.
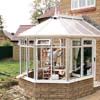
Step 7
Now you can have fun choosing furniture and plants. Sit back and enjoy the additional space, light and quality of lifestyle provided by your Ultraframe conservatory.